

Boo! Halloween is a few weeks away so I thought I'd conjure up a fun treat to make if you're throwing your own Halloween party this year, or if you're going to need something to keep up your energy levels if you're on tick or treat duty! I must confess, this idea is inspired by something I saw on Pinterest but I've adapted it to make it my own! This is super easy and quick to do, all you need is for your Halloween pizza is...
- A ready made pizza base or if you're very talented make your own
- Tomato purée
- Mozzarella pearls or one ball
- Green or black pitted olives
- Green pesto
- Black edible food pen, I bought mine from Hobby Craft
How to make your Spooky Halloween Pizza:
Step one: Begin by spreading the purée on your base. Then add any herbs, I sprinkled dried basil, dried rosemary and freshly cracked black pepper. On top in a large swirl drizzle your pesto over the base.
Step two: Cut an olive in half, pop one on your pizza and then cut eight thin strips, if you can't cut out eight, just use another olive to make up for the rest. Place them either side of the olive 'body' and viola you have your spider! Do this for as many olives as you like, I made three olive spiders.
Step three: Tear up your mozzarella ball into rough round shapes and place all around the pizza, try to keep the pieces quite thick, this is so they stay opaque. I did a few of mine too thin and they dissapeared once the pizza was cooked.
Step four: Bake in the oven for 10-14 minutes at 220C and leave to cool for 5 minutes.
Step five: Using your black pen add eyes and a little 'o' mouth to the pieces of Mozzarella! Spooky cheese, who knew it was a thing?


1 comment
Everyone love cookies, especially when they're soft, chewy and full of chocolate. With so many people following a vegan and dairy free diet at the moment I had a go at testing my very own recipe and baking some of everyone's favourite cookie, the chocolate chip. This recipe is super simple and it takes no time at all to whip up a batch, so it's really handy to have if you have people coming over. I really hope you enjoy baking these and sharing with friends and family. P.S Don't forget to serve with the traditional glass of milk (almond or soy of course). I also have another exciting cookie recipe coming up which has been inspired by everyone's favourite mythical creature... any guesses what it could be?

To make the vegan chocolate chip cookies you'll need:
100g vegan butter/spread
100g caster sugar
1/2 teaspoon vanilla extract
1/2 teaspoon vegetable oil
150g self -raising flour
75g dark (vegan) chocolate cut up into small shards or you can use chocolate drops.
How to bake these delicious vegan chocolate chip cookies:
How to bake these delicious vegan chocolate chip cookies:
- Pre-heat the oven to 190c or Gas mark 5 and line your baking tray with grease proof paper.
- Measure the butter and sugar into a medium sized mixing bowl and beat until creamy. Add the vanilla extract and the vegetable oil until mixed well.
- Mix in the flour and add in the chocolate, if you're finding it hard to mix, use your hands to make the dough come together. Then pop the bowl into the fridge for 15 minutes.
- Spoon big teaspoons of the mixture onto your baking tray. This recipe should make around 8-9 big cookies or 20 smaller ones.
- Then put them into the oven for 15 minutes or until golden brown.
- Once out of the oven leave the cookies to cool on the tray for 10 minutes.
- These cookies should last for up to a week in an airtight tin but I doubt they'll last that long!


More than ever I feel like we need a little bit of love in the world, and what could be better than in the form of a cupcake? (Probably a lot more things but never mind). So, after feeling inspired by all of the amazing women and men who attended the Women's March on Saturday, I decided to bake some cupcakes that were just as sweet as them. These cakes would also be perfect for Valentine's day which is less than a month away. So whether you're having a galentine's party (thanks Lesie Knope), planning your next Women's March with your best girl bosses, having a romantic night in with your boyfriend or girlfriend or just feel like stuffing your face with yummy cupcakes, then this is may be the recipe for you.


Makes 12 Duo Colour Love Cupcakes
Cupcake ingredients:
200g butter or margarine, softened at room temperature
200g caster sugar
4 free-range eggs, lightly beaten
1 tsp vanilla extract
50g dark chocolate chips
200g self-raising flour
1-2 tbsp milk
Top tip – Make sure all of your ingredients are at room temperature; this will give you the best results!
Vanilla Buttercream ingredients:
200g softened unsalted butter
400g sifted icing sugar
2 teaspoons vanilla extract
Splash of milk
Food colouring
How to make the cupcakes:
Preheat the oven to 170 C / Gas 3 and place your cupcake cases in your tray so they are ready to go.
Either by hand or using an electric mixer beat the butter for five minutes until soft. Slowly add the caster sugar into your mixer/bowl and mix up until light and fluffy. Pour in the vanilla extract and then add the eggs one by one - whizz again to make a yellow batter. Slowly add the flour and mix until it is smooth, you'll need to do this for about 5 minutes. Finally fold in your chocolate chips, for an extra sweet surprise. The longer mixing time enables air to get into the mixture which will make the sponge lighter and fluffier.
Spoon the mixture into the twelve cases until about 3/4 full. Now pop in the oven on the middle shelf for 20-25 minutes. Remove the cupcakes from the oven after 15-20 minutes depending on your oven. You can check if they are ready by using a cocktail stick - it should come out clean. Leave on a cooling rack for 30 minutes or until cool, then it's time to decorate!
Beat the unsalted butter for around 5 minutes or until it's pale and fluffy. Add in the icing sugar using large spoonfuls. Add in a splash of milk if the mixture is too thick and dry, pop in the the vanilla extract then continue mixing until fluffy and well incorporated.
Separate the buttercream into two medium bowls, in one bowl add a small amount of pink food colouring and mix well. Place the pink icing sugar in one piping bag with a star nozzle. In another bowl add red food colouring to your buttercream. Then add into the same piping bag as your pink. Then carefully pipe a big swirl on top, I find it easier to start of with a small dollop and then work around that. Now it's time to decorate! I've found some cute heart sugar sprinkles from Hema, and then finished off with either a mini chocolate heart or sugar rainbow decoration.


Want more? Why not try my Winter Sundae cupcakes or Easy Apple Pie recipes.
I woke up on Sunday morning after a very busy couple of days with a huge urge to make an apple pie. So I grabbed a copy of my Baking Bible by Mary Berry and got baking. I've slightly adapted the recipe to my own taste, as her recipe includes cloves and I'm not the biggest fan. Pies like these are just what you need on a cold Autumn day, they're filling, delicious and the perfect accompaniment to a special Sunday dinner. My family absolutely loved eating this so I know it's one I'm going to be making again, next time I might add blackberries or raisins to add some extra sweetness into it!


To make the apple pie filling you'll need:
675g cooking apples
62g caster sugar
½ tsp ginger
2 tsp cinnamon
3 tablespoons of cold water
For the pastry:
175g plain flour
50g diced butter
50g diced white baking vegetable fat (like Stork)
2 tablespoons of cold water
Milk (to glaze)
Granulated sugar, for sprinkling
- Use a shallow pie dish. Peel, core and cut the apples into thick slices. Arrange half if the slices in the bottom of the dish, sprinkle with half of the sugar and spices. Then add the rest of the apple slices, the sugar and the spices. Then drizzle over the cold water.
- To make the pastry, measure the flour into a bowl. Add the diced butter and white vegetable fat and rub together with your fingers until the mixture becomes like breadcrumbs. Add the water and mix to a firm dough.
- Roll out the dough onto a lightly floured work surface to a size that will cover the top of the pie dish. Lift the dough on the dish and trim the edges. If you like, you can use the trimmings make decorative shapes and light press on to the dough. I chose to add on stars but hearts, leaves or flowers could work too. Chill in the fridge for 30 minutes.
- Pre-heat the oven to 200C. Brush the pie with a little milk, then sprinkle on the sugar. Make a small slit in the centre of the pie for the steam to escape. Bake in the pre-heated oven for about 40 minutes, until the apples are tender and the pastry is crisp and a light golden colour. Cover the pie loosely with foil towards the end of the cooking time if the pastry starts to brown.
- If your fancy really treating yourself serve with custard or good quality vanilla ice-cream. Enjoy!

Easter is nearly here! Not only does that mean that a four day weekend is coming up, but it also means that you're allowed to eat chocolate for the whole time! So, I decided to make possibly the most flamboyant cupcakes ever made, as a fun Easter treat. I recently bought a bunch of baking goodies as I thought my little baking cupboard was lacking some more exciting decorations. I searched online for some new pieces and came across some super bright food colouring, edible liquid copper paint (which I used to paint the mini eggs) and edible holographic glitter, a few weeks later, these cakes were created.


To make the Easter cupcakes you'll need:
175g butter, cut into large pieces
175g self-raising flour
175g caster sugar
½ tsp baking powder
3 large eggs
½ tsp vanilla extract
A drop or two of pink and purple food colouring, I use Wilton
Decorations; I used mini eggs, edible food paint and edible glitter
For the chocolate buttercream you'll need:
85g butter
175g icing sugar
2 tablespoons cocoa powder
1 tablespoon milk
- For this recipe I'm going to be using Mary Berry's Vanilla cupcake one, as it never goes wrong and sometimes I day dream and pretend I'm her... So, preheat the oven to 180 degrees or gas mark 4, and line a regular 12 hole tin with baking paper cases.
- Put all the cake ingredients into a large bowl and beat with an electric hand whisk or a wooden spoon until smooth and evenly mixed, add in your pink food colouring. Save an eighth of the mixture and add a dash of purple food colouring. Don't worry if you've already made the whole mixture pink, the purple will still blend in easily.
- Divide the mixture evenly between the paper cases. Once you've added in all of your pink cake batter add a teaspoon of the purple mixture and swirl in the cake case with a knife or skewer for a more professional effect.
- Bake for 20 minutes, or until the cakes are well risen and firm on top. Transfer to a wire rack to cool.
- Whilst the cakes are cooling it's time to make your chocolate buttercream. Mix butter and icing sugar until smooth. Add in cocoa powder, if you find that it's not coming together nicely, add in a drop of milk and mix again until smooth.
- Once your cakes have completely cooled add your buttercream to the top of your cake. You can use a piping bag, palette knife or a regular kitchen knife (which is what I used) to create your frosting design. My Cupcake Addiction has some amazing videos on her channel if you're looking for some frosting inspiration.
- It's time to decorate! I painted my mini eggs with copper food paint and popped them on top in groups of three, to finish I then sprinkled some edible holographic glitter to make them extra sparkly!

When I did my little Twitter survey a few weeks ago lots of you said you'd like to see some more lifestyle blog posts, and although this is technically baking I still thought it'd be a lovely post to put together! These aren't just any cupcakes, these are winter sun-dae cupcakes (see what I did there...?) For those of us in a desperate need for a sunny holiday! I can't promise everyone a beach holiday but I can give you this recipe to these cupcakes which look just like ice-cream sundaes! Now, I have a confession, just like my last baking blog post, I didn't make these as I cannot make a cupcake good as this. I collaborated with my friend and self taught baker Bryony who has the most gorgeous and mouth watering Instagram (which you can check out here!) Enjoy!


Makes 12 Vanilla Sundae Cupcakes
Cupcake ingredients:
175g (6 oz) softened unsalted butter
175g (6 oz) caster sugar
2 teaspoons vanilla extract
3 eggs
175g (6 oz) self-raising flour
Top tip – Make sure all of your ingredients are at room temperature; this will give you the best results!
Vanilla Buttercream ingredients:
200g softened unsalted butter
400g sifted icing sugar
2 teaspoons vanilla extract
Splash of milk
Glazed cherries
Wafers
Sprinkles
How to make your sundae cupcakes:
Preheat the oven to 170 C / Gas 3 and place your cupcake cases in your tray so they are ready to go.
By hand or by using an electric mixer beat the butter for five minutes until soft. Slowly add the caster sugar into your mixer/bowl and mix up until light and fluffy. Pour in the vanilla extract and then add the eggs one by one - whizz again to make a yellow batter. Slowly add the flour and mix until it is smooth, you'll need to do this for about 5 minutes. The longer mixing time enables air to get into the mixture which will make the sponge lighter and fluffier.
Spoon the mixture into the twelve cases until about 3/4 full. Now pop in the oven on the middle shelf for 20-25 minutes. Remove the cupcakes from the oven after 15-20 minutes depending on your oven. You can check if they are ready by using a cocktail stick - it should come out clean. However keep an eye on them, you'll know when to take them out as they'll bounce back to the touch and the top will still look slightly sticky. Leave on a cooling rack for 30 minutes or until cool, then it's time to decorate!
Beat the unsalted butter for around 5 minutes or until it's pale and fluffy. Add in the icing sugar using large spoonfuls. Add in a splash of milk if the mixture is too thick and dry, pop in the the vanilla extract then continue mixing until fluffy and well incorporated.
Separate the buttercream into two medium bowls, in one bowl add a small amount of pink food colouring and mix well. Place the pink icing sugar in one piping bag with a star nozzle. Fill a separate piping bag with a star nozzle with your vanilla buttercream that you set to one side. Pipe the pink buttercream on top of the cupcakes. Then carefully ice on top of this with a smaller amount of buttercream, so you get the effect of two flavours of ice cream! Now it's time to decorate! I've popped a glace cherry on top, and finished with sprinkles and a triangle of wafer. However you could always add chocolate sauce, fresh berries, a paper straw or even a chocolate flake!
So it would seem that Christmas really is over, it's one of my absolute favourite times of the year and I'm already getting excited about the next one! The combination of being with your family, eating all of the best food, the time you spend with friends in the lead up and playing board games is just something I'll always absolutely love to do. So to try and drag out the festivities for as long as I possibly can I thought I'd share two hot drink recipes inspired by the talented community of Pinterest to warm up your dreary winter days. I splashed my drinks into these mugs by Cornishware and even personalised them with my parents names and a post Christmas thank you present. They make a really nice alternative thank you gift instead of sending flowers, chocolates or wine especially as there is the option to personalise.
Spiced apple tea:
For this recipe you'll need; 1 cup of apple juice, 1 cinnamon stick, 1 tsp of mixed spices, and a 1 tea bag. Simply let the apple juice, cinnamon stick and spices simmer in a small pan over a medium heat for a few minutes. Pop the hot apple juice into your mug, discard the cinnamon stick and add in your tea bag to give it a tea flavour, remove your tea bag after your desired time. Lots of shops also sell apple and cinnanon flavoured tea, I'd recommend the Teapigs one if your a bit rushed off your feet to create this one. To finish slice an apple so you have a disc shape and use a star cutter to cut out your shape, and then add to your tea to give a festive finish and some extra flavour!


Peppermint hot chocolate:
This chocolately recipe is made for one, so for this treat you'll need 1 mug of milk, 3 tablespoons of a good quality cocoa powder and a pinch of flaked sea salt. In a small pan mix the milk, cocoa powder and salt together. However if you want to be extra fancy you can melt some dark hot chocolate over an bain-marie and add this to your hot milk. To get the peppermint flavour add a candy cane to the mug and this will slowly release the minty flavour into your drink. If you want to create a bit more of a grown up drink you could always swap the candy cane for a shot of Bailey's or Jack Daniel's, the perfect indulgent drink to have whilst wrapped up in a blanket and watching your favourite film!


As a fashion and lifestyle blogger I try to make sure I post what I would like to see, and that's variety. I used to post recipes all the time, but as the fashion side of my blog grew the recipes seemed to disappear. However they're back, and if you've not been able to guess already I've got a pretty special rocky road recipe to share with you, what's even better - it's veggie friendly. In this recipe I popped a load of the smooth caramel and Belgium chocolate popcorn from Joe and Seph's* on top and I think it added a really amazing crunch to it. I substituted the marshmallows with a Mars bar which creates a nice softness in the rocky road and it means that no little piggies were hurt in the making of these. A bit of a bonus for all of you vegetarian rocky road lovers out there! I was kindly sent a few of the popcorn pouches from the brand and I've included my favourite flavours in the photo below (one of which was the inspiration behind the post)! I loved the cheese and paprika, vanilla cheesecakes and the smooth caramel and Belguim chocolate flavours. I'm still yet to try their legendary gin and tonic flavour, I think it would be a great thing to serve at a summer picnic or BBQ.
For this recipe you will need:
500g of milk & dark chocolate
1/3 cup of raisins
10 glacé cherries
2 chopped up Mars bars or marshmallows
10-15 digestives
70g of Joe & Seph's popcorn or any toffee popcorn
Hundreds and thousands (to sprinkle on top)
500g of milk & dark chocolate
1/3 cup of raisins
10 glacé cherries
2 chopped up Mars bars or marshmallows
10-15 digestives
70g of Joe & Seph's popcorn or any toffee popcorn
Hundreds and thousands (to sprinkle on top)
Other options you could pop in are; Maltesers, Snickers, nuts, cranberries or even coconut flakes.
How to make:
- Line a medium sized square baking tray with cling film. I didn't have one of these so I just used a pie dish. Feel free to use anything you like, just make sure it's not too big and that it's deep enough.
- Break up your biscuits into chunks. You don't need to be careful with this I just snapped the biscuit in half a few times and found this size worked well!
- Create a bain-marie and melt the chocolate slowly on a low temperature, or simply pop in the microwave for a few seconds a time. Make sure you stir your chocolate each time to ensure it's melting evenly.
- Take your biscuits, mars bars, fruit and any other tasty treats you are using and and combine with the chocolate mixture. Stir well to ensure everything is completely covered. You will need to keep a little bit of the melted chocolate to one side to drizzle on top.
- Tip the mixture into the lined dish, and spread the mixture out into the corners. Lightly press your popcorn pieces on top, drizzle on the remaining chocolate with a spoon and finally scatter over your hundreds and thousands.
- Refrigerate for at least 2 hours then cut into fingers or squares, serve and most importantly enjoy!


*This post was created in collaboration with Joe & Seph's

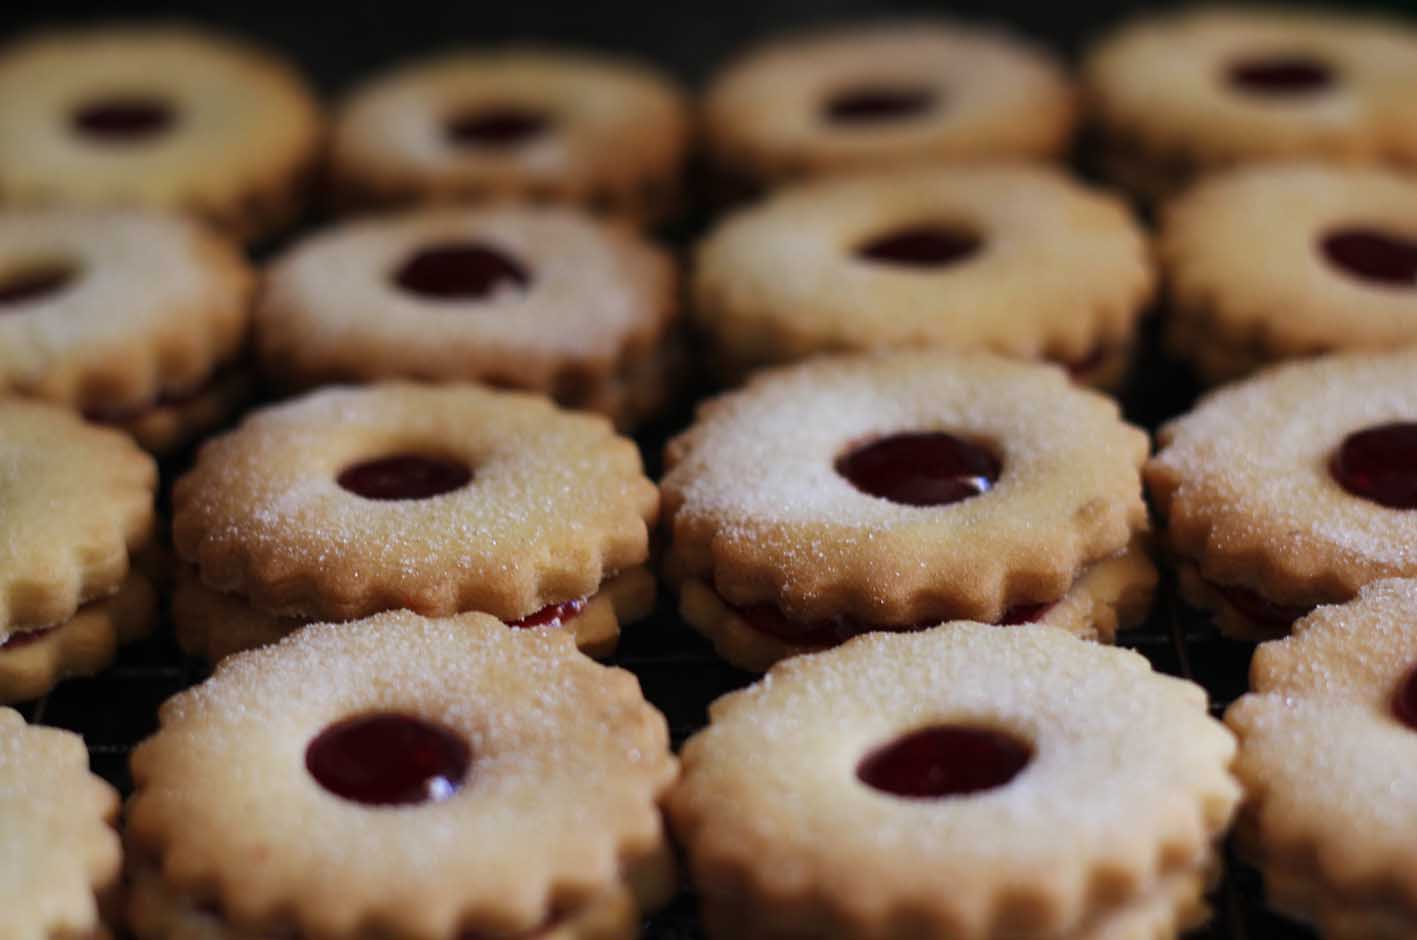
This recipe has been adapted from the BBC Good food website & then made by me! My sister who is an amazing baker helped me out with this blog post and I can safely say they taste really good, and are a firm favourite in our household. These would make a great and inexpensive gift for Christmas if you used either stars, baubles or Christmas tree shapes.
For this recipe you will need:
- 225g unsalted butter, softened
- 100g caster sugar
- 200g plain flour, plus extra for dusting
- 100g ground almonds
- 100g strawberry, apricot, cherry or raspberry jam, anything you fancy! You'll need around half a jar.
- Put the butter, sugar, flour and almonds into a bowl and use an electric whisk until the mixture nearly comes together and forms a ball. Wrap in cling film and leave in the fridge for at least 1 hour.
- Remove the dough from the fridge and knead until it is soft enough to shape and roll. Divide into two even-size balls. Sprinkle a little plain flour over your work surface and roll out one ball of pastry. The dough should be approximately 5mm thick. Using a cookie cutter or any shape you like cut out as many shapes as you can. Keep going until you have about 25 shapes. Carefully place them onto a baking sheet, making sure you keep them slightly apart.
- Roll out the second ball of dough the same way. Cut out the same-size stars and place them on a baking sheet. Now cut out a small circle in the centre of each biscuit using a small cookie cutter or the end of a large piping nozzle.
- Heat oven to 140C (if you have a fan pop it onto 120C) or gas mark 1 and cook the biscuits for 20-30 mins until they are a lovely golden colour. Remove from the oven and place on a cooling rack to completely cool. Place a generous blob of jam onto the centre of the biscuits without the cut-out circle. Place the top halves of the biscuits on and push down gently and there you go. Your very own jammy dodgers!
For this simple but really tasty recipe you'll only need 3 ingredients: 180 grams of plain flour, 55 grams of sugar (plus some extra to finish) and 125 grams of butter.
Preheat your oven to 190C or gas mark 5. Combine butter and sugar until creamed, then add the flour gradually to create a smooth mixture. Flour a work surface and roll out your mix. Shape into your desired design, I went for a sausage dog cookie cutter but you could do fingers, rounds or stars! Chill your shapes in the fridge for 20-30 minutes, sprinkle with your extra sugar and bake for 15-20 minutes! Then let them cool down on a wire rack for 15 minutes and enjoy.


If you are like me and trying to eat just that bit better this year, this recipe might just help you with some of those sweet cravings you have been having. At just 167 calories each they are even better for you than the Starbucks Lemon & Poppy seed "skinny" muffin which contain a suprising 338 calories. These cupcakes are so light and full of flavour you won't miss the butter or 100+ grams of sugar in your regular cakes. I found this recipe on the BBC Food website, this one is by The Hairy Bikers.
Cake Batter:
- 200g self-raising flour
- 1 tsp bicarbonate of soda
- 75g golden caster sugar
- 100g Blueberries
- 1 unwaxed Lemon, zested
- 2 eggs
- 150ml low-fat natural yoghurt
- 2 tbsp semi-skimmed milk
- 50ml sunflower oil
Lemon Icing:
- 100g icing sugar (Top tip: Use the Lemon juice from the Lemon you zested earlier)
- 4 tsp fresh lemon juice


- Pre-heat the oven to 180C and add your paper cases to your cake tray
- Sift the flour and bicarbonate of soda into a bowl
- Add the Blueberries, sugar and Lemon zest, then make a well in the mixture and add the eggs
- Beat in the milk, yoghurt and oil into the flour mixture until lightly but well mixed.
- Divide the mixture into the cases and bake in the oven for around 16 minutes
- Once baked let the cakes cool on a wire rack and begin to make the icing
- Simply combine the Lemon juice and icing sugar together, a bit at a time until smooth and top your cupcakes.
- Wait 15-30 minutes for the icing to set and try to resist eating them (...if you can!)

If you give these a go please let me know, I'd love to see how yours turn out!
P.S If you want to see what I've been up to recently check out and follow my Instagram: @iamdaisyalice

Whilst most of us are mourning the loss of The Great British Bake off from our Tuesday night evenings, I have a recipe that might just help us move on and prepare us for next year. Party rings are one of my all time favourite biscuits, but I was really shocked when I found out recently that they aren't vegetarian as they contain pork gelatine. So I took it upon myself to create my own version, these were really easy to make and they don't take too long to bake either.
For this recipe you will need:
1 & 1/2 cups of butter
2 cups of caster sugar
3 eggs
1 & 1/2 tablespoons of honey
5 cups of plain flour
2 teaspoons of baking powder
1 teaspoons of salt
For the icing:
Icing sugar
Icing sugar
Water
Food colouring (I went for pink & blue)


In a large mixing bowl cream the sugar and butter together, once mixed well together add the eggs and baking powder. Then stir in the flour and the sallt, mix the ingredients together until it makes a dough like mixture. The dough then needs to sit in the fridge for at least one hour to chill.
Pre-heat the oven to 200 degrees and take out the dough from the fridge, flour your surface and rolling pin and begin to roll it out. Take a medium sized circle cookie cutter and a smaller circle cutter ( I didn't have one of these I just used a cap from a piping bag) and cut out your shapes until you're left with a ring. Lay the rings onto a baking tray lined with greaseproof paper and put into the oven for 8-10 minutes.
Once baked they need to cool before they're iced. For my icing I made the measurements up myself but I added smaller amounts of water to the icing sugar until I was happy with the consistency. It's really important not to add too much water otherwise you'll end up having to use lots of icing sugar to thicken it up again.
When decorating the biscuits I chose one colour to be my base and the other colour will be used for the stripes. Put your base icing on first and let it set for a around 10/20 seconds and using another spoon drizzle the other colour on top, so it creates the striped effect. Once you've done this to all your biscuits let it set in the fridge for a few hours and then they're ready to eat!

Subscribe to:
Posts (Atom)